Interface
Home screen
The home screen is your starting point. You'll see three buttons: Server, Split and Client. Click the mode you need and you're ready to go.
If you already have an active client connection, you'll see an orange indicator on the Client button when you return to the home screen. This tells you your connection is still running.
Navigating within a mode
In both Client and Server mode you'll find a Home button in the top-left corner to return to the home screen. Your session is preserved: connections and configurations stay intact when you switch, and even when you close and reopen Modbux entirely.
In Split mode there's no Home button. Close the server window to return to the home screen. Your server configuration is preserved and the server stays active.
Client mode
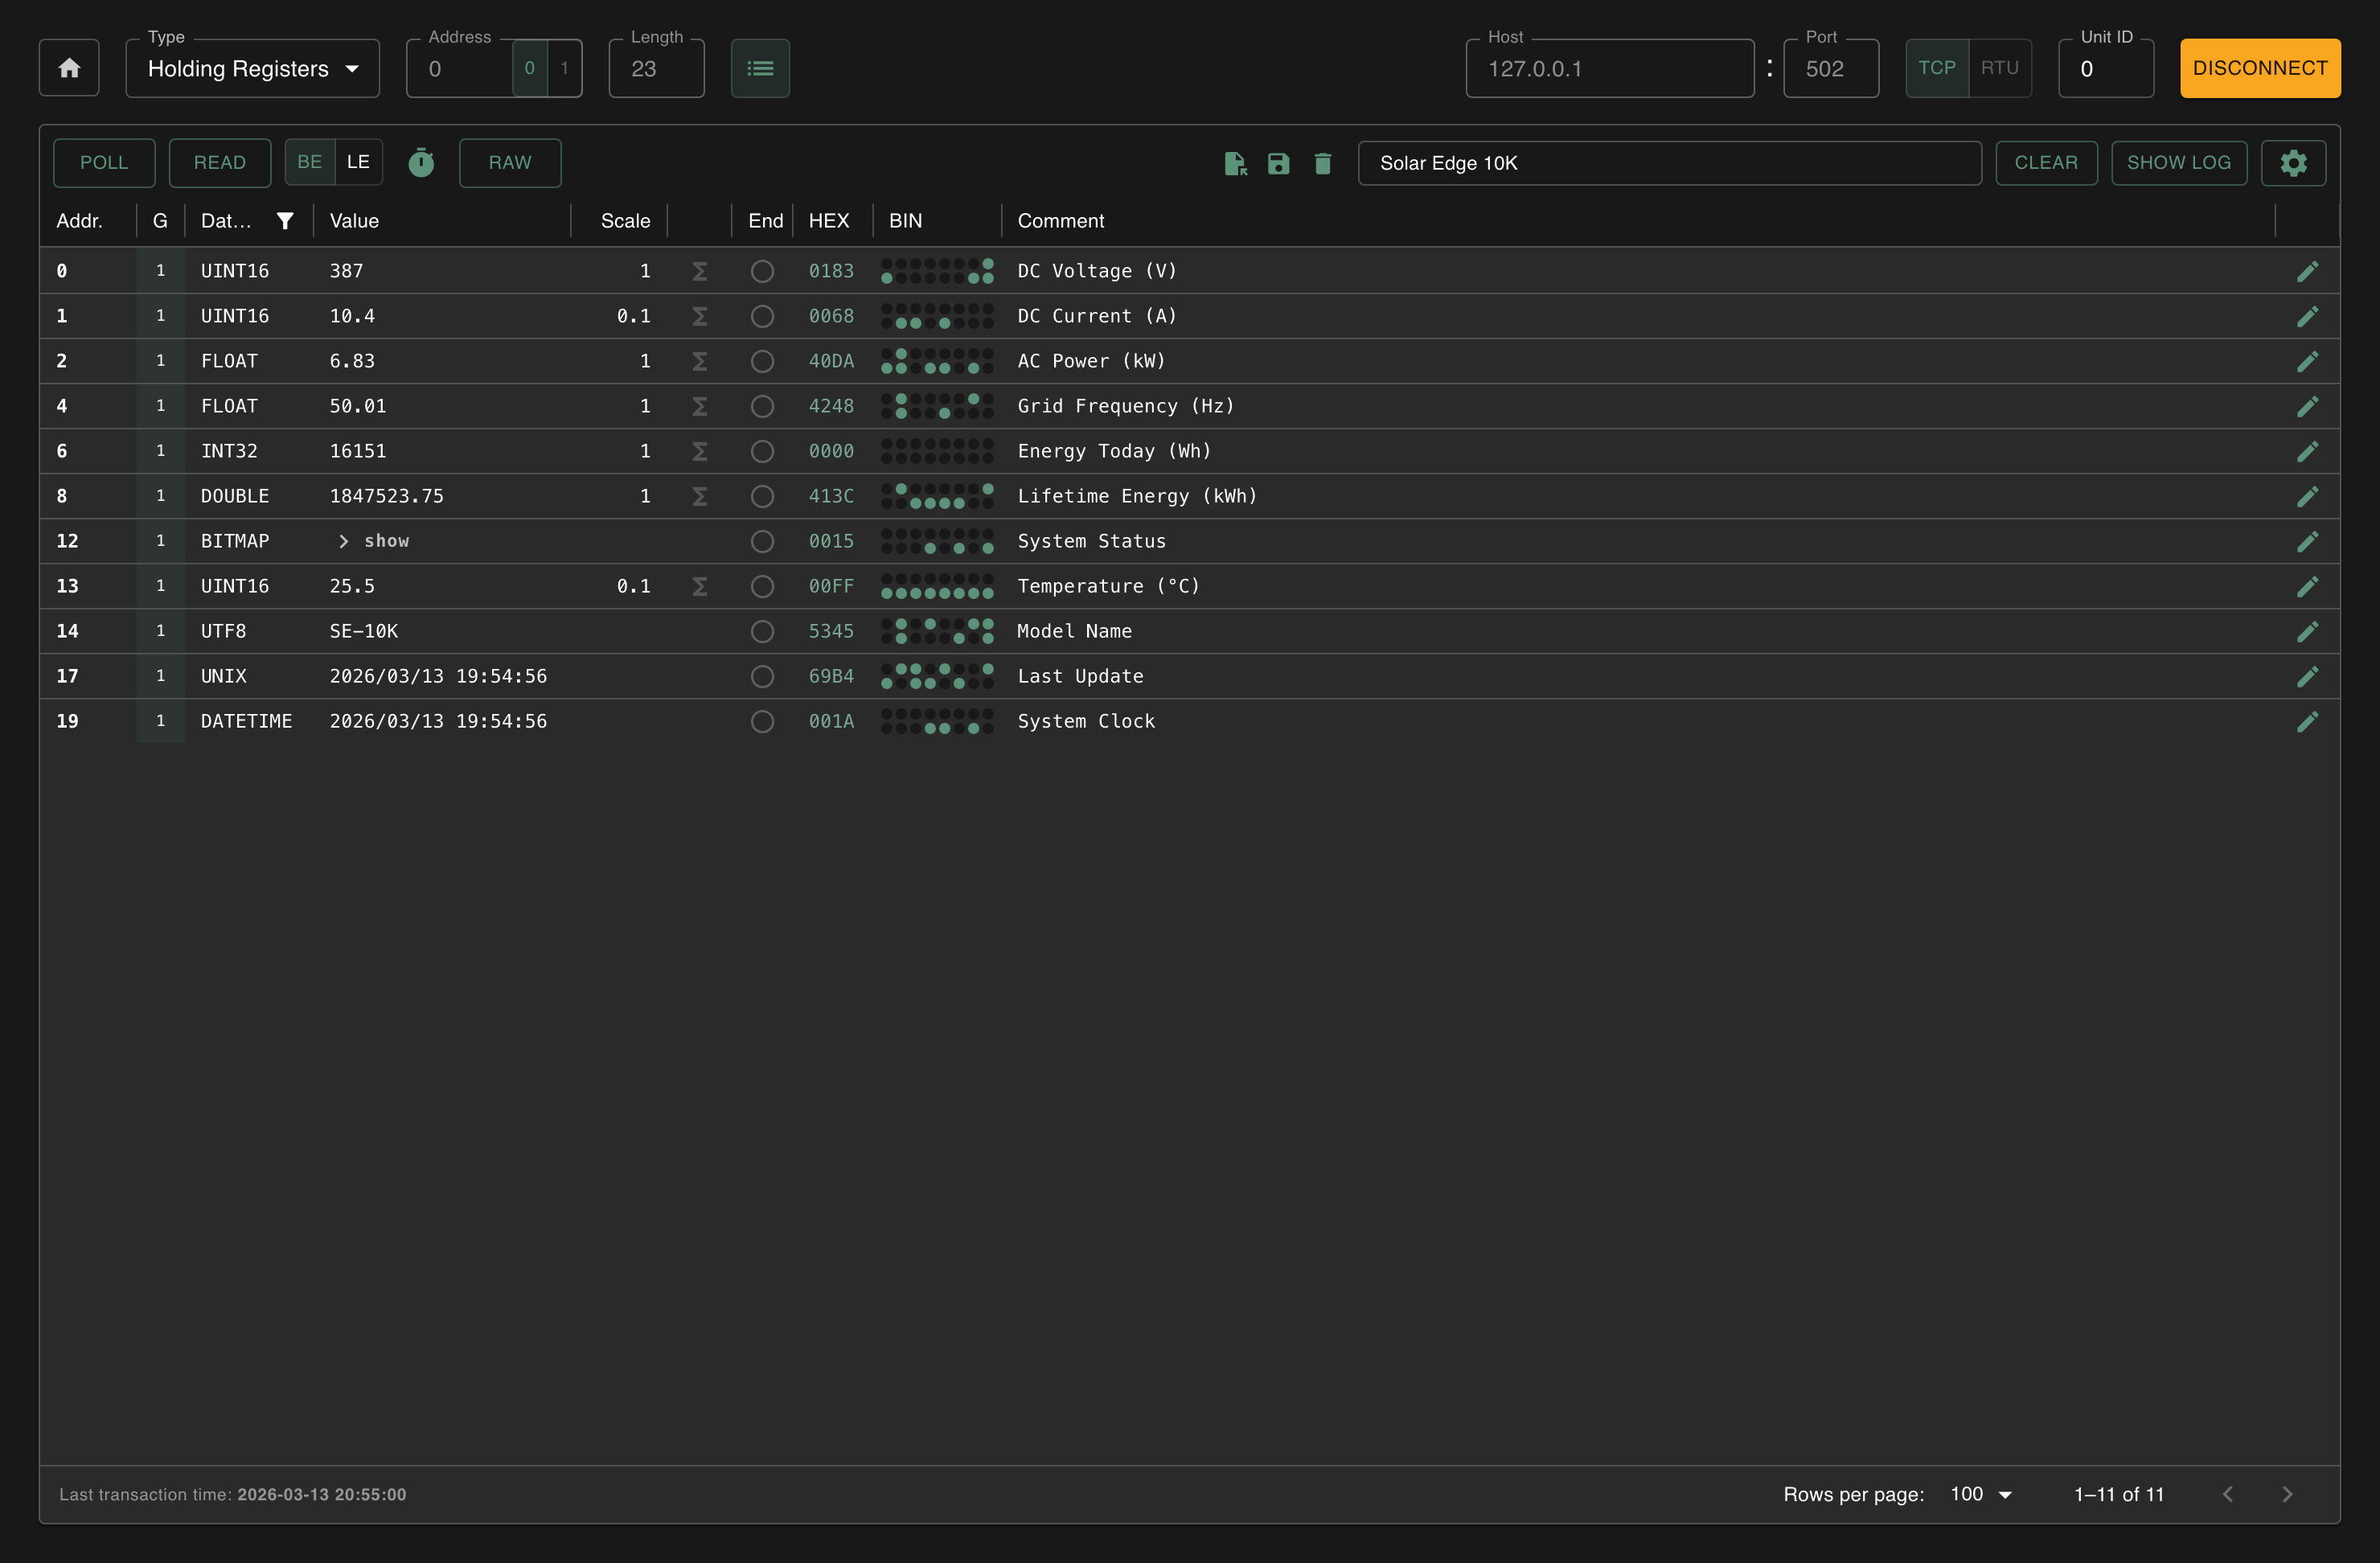
The Client interface is built around three zones:
At the top you configure everything: on the left the register configuration (which type, starting address, how many, or read the configured registers only), on the right the connection settings (protocol, address, Unit ID).
In the middle you'll see the data grid. This is where your register values appear, grouped by type (Holding Registers, Input Registers, Coils, Discrete Inputs).
The toolbar gives you control over reading and writing: Poll for continuous reading, Read for a single read operation, and buttons for configuration management, word order and advanced features.
Write buttons are located on individual rows in the data grid, not in the toolbar.
Server mode
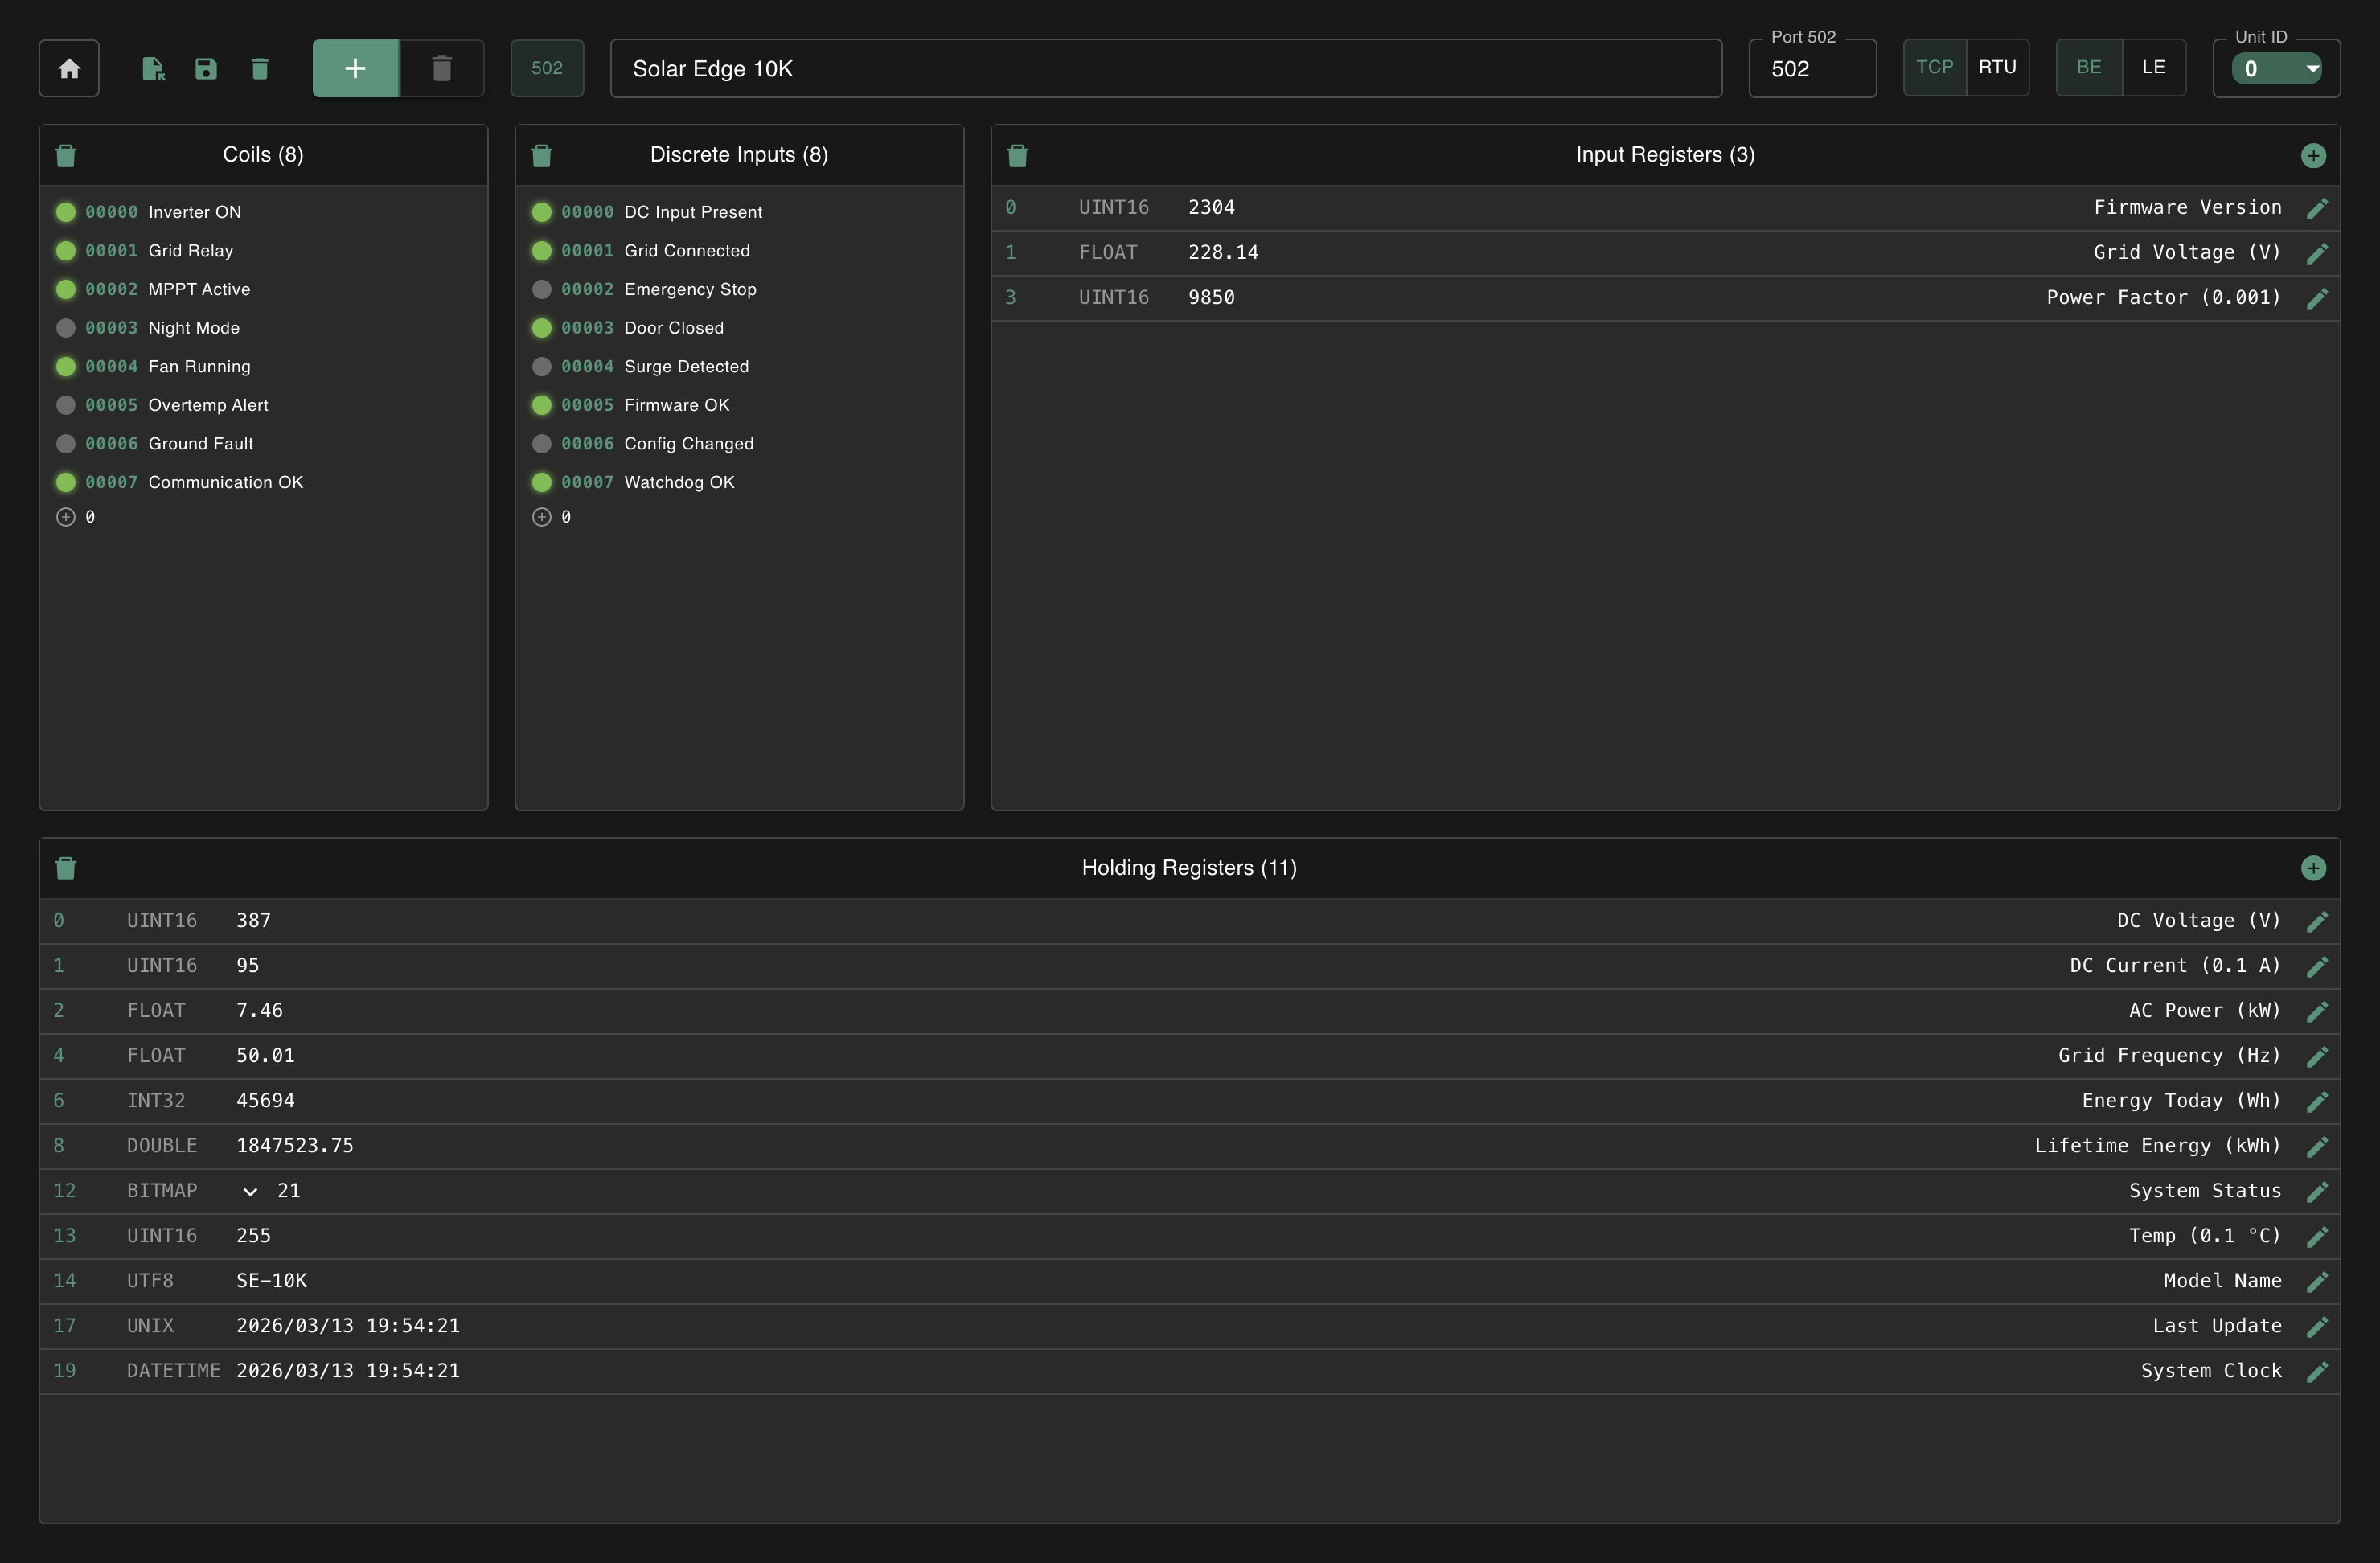
The Server interface is simpler:
At the top you'll find the server toolbar. The layout from left to right: connection settings (port for TCP, or COM port and serial parameters for RTU), the TCP/RTU toggle, word order (BE/LE) and Unit ID selection. In TCP mode you also get the server selector buttons and name field. In RTU mode the multi-server selector is hidden since only one RTU server can run at a time.
Below that are four collapsible panels, one per register type. Click a panel to open it, add registers and configure values. Collapse panels you don't need for more workspace.
Split mode
Split mode opens two windows that operate independently:
- The new window is your server
- Your main window becomes the client
- Configure your server, connect via
localhostfrom the client, and test your communication - Close the server window to return to normal
Getting Started
Download and install Modbux on Windows or macOS. Launch the app, choose Client, Server or Split mode, and start reading Modbus registers.
Understanding Modbus
Learn Modbus fundamentals. Register types, function codes, data addressing, big-endian vs little-endian word order, and TCP vs RTU differences.