Server Overview
Server mode turns Modbux into a virtual Modbus device. You simulate a server (slave) that a client can connect to, without needing any physical hardware.
Servers start automatically as soon as you create them. There's no start/stop button. Your server is immediately reachable.
When do you use Server mode?
- You're developing software that needs to communicate with a Modbus device, but the device isn't available yet
- You want to test your client configuration before working with a real device
- You want to set up a demo environment
- You want to develop both sides of a communication simultaneously with Split mode
Features
Multiple Unit IDs
A single server can simulate up to 248 virtual devices (Unit ID 0-247), each with their own registers. For example, simulate a temperature sensor on ID 1 and a pressure sensor on ID 2.
Multiple servers
Run up to 10 independent servers simultaneously, each on its own port. Useful when you need to test multiple network segments or protocol variants.
Value generators
Let register values randomize automatically between a min and max at a set interval. Time-based generators for Unix timestamps and datetime registers output the current system time.
Bitmap data type
Define 16-bit bitmaps with per-bit toggle circles. Useful for simulating status registers where each bit represents an independent flag.
UTF-8 strings
Store text values across multiple registers (1-124 registers) with a real-time byte counter. Ideal for simulating device names, serial numbers or status messages.
Timestamps
Unix timestamps (2 registers) and datetime in IEC 870-5 format (4 registers). Industry-standard time representations used in SCADA and automation systems.
Interface at a glance
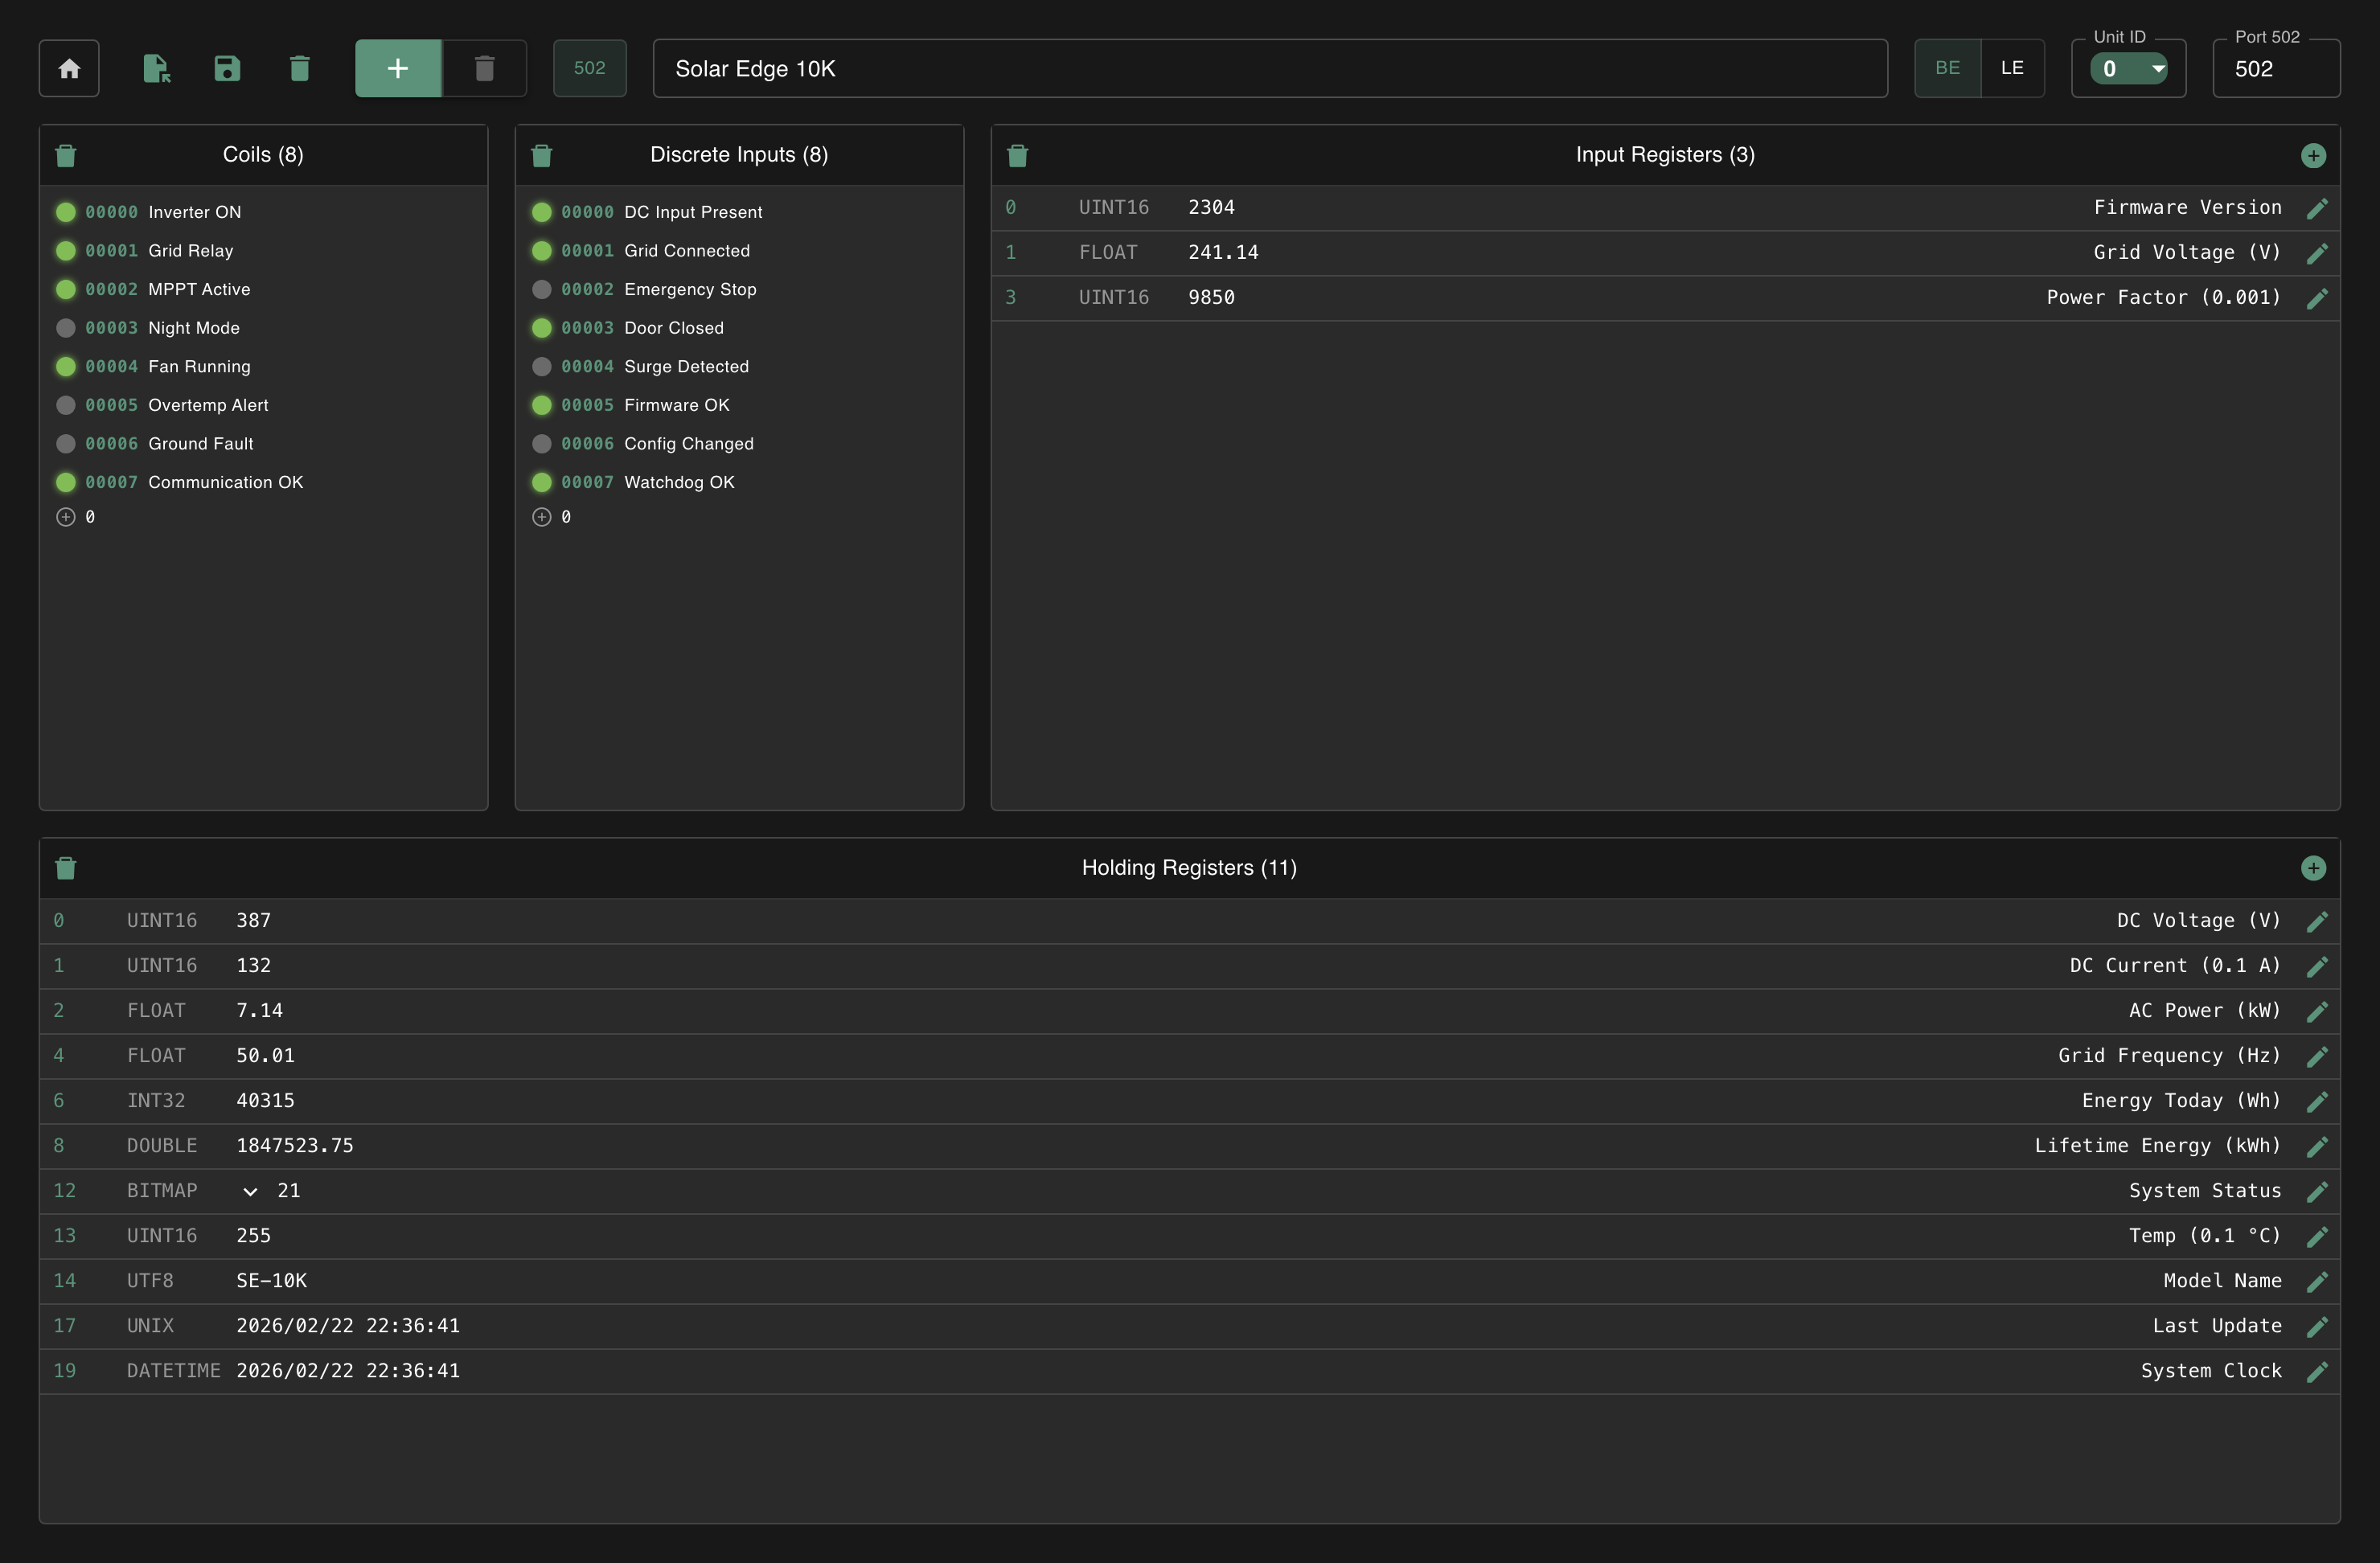
At the top you manage your servers: add or remove servers, give them a name, choose the port and select which Unit ID you want to configure. The BE/LE toggle in the toolbar sets the endianness globally for the entire server, so all registers share the same word order.
Below that are four collapsible panels, one per register type (Coils, Discrete Inputs, Input Registers, Holding Registers). This is where you add registers and set values.
For booleans (Coils and Discrete Inputs), each address gets its own row with a toggle circle, an inline editable comment and a hover-to-reveal delete button. Use the inline add bar to quickly add new addresses.